Affichage des articles dont le libellé est Posts. Afficher tous les articles

Automatic Publish Blogger Posts To Google+, Facebook, Twitter

Publish Blogger Posts Automatic To Facebook, Twitter And Other Social Network Quickly


Its a Best way to get traffic on your blog with automatic blogger post publishing on different social media network easily & quickly. Social media plays an important role in improving any blog's SEO.That's why you may watch social media gadgets almost on every blog/website.If you have enough number of subscribers on social sites then just automatically publish your posts on social sites and get the traffic.Today I am giving a tutorial about automatically posting on Google Plus, Facebook, twitter and some other social media sites with using dlvr.it service which is totally free of cost. I am also using this service to publish my blogger posts google plus , facebook and twitter.The reason behind to choose dlvr.it is it is very easy to use and install.You can on-off auto publishing anytime and very easily. Is your blog content ready to blast off?

Lets see how to use it.

Automatically Publish Blogger Posts On All Social Web Sites

  • First go to dlvr.it
  • Signup with giving your email address and choosing password.
  • Now go to your inbox and confirm your email address first
  • You will redirect to another page here you have to provide your feeds address in below format


http://feeds.feedburner.com/FEEDBURNER USERNAME HERE
  • Click on twitter icon and you will redirect to twitter
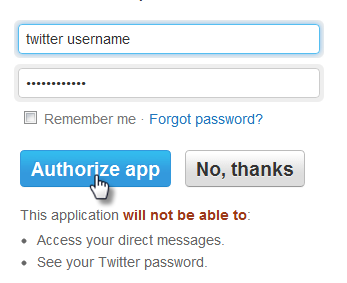
  • Give your twitter's profile's username and password and hit "Authorize App" button.Now your posts will automatically publish on twitter.
  • Now click on facebook icon.
  • You will redirect to facebook page.Log in to your facebook account from which you are managing your fanpage and select your fanpage.
  • Customize your services as you wish and save your changes.
That's all about auto posting on social networking.If you know more services then share it using contact form below..

Clean Add Related Posts Widget To Blogger With Thumbnails

Clean Add Related Posts Widget To Blogger With Thumbnails 

Related Posts Widget

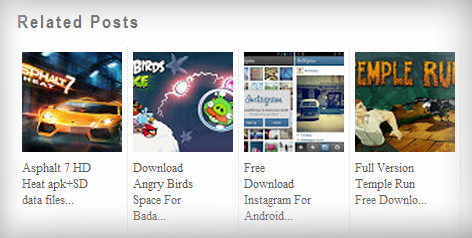
Displaying related posts is a smart way for keeping your site visitors around and with thumbnails it is even smarter!This widgets is one of most popular way to increase to show related post to blogger.After you will add this widget it will start above comment section.The related articles are chosen from other posts in that same category/label/tag.Related post widget help you to show visitor your past and previous stories.It also help to increase page and make readers engaged on reading your blog post.

Features

  • Responsive Design
  • Fast Loading And SEO Friendly.
  • Shows Post of  same category/label/tag.
  • Blog Post Title with Thumbnail.
  • Easy to Install.

Related Widget


Steps adding the Related Posts Widget to Blogger/Blogspot

Step 1. Go To Blogger Dashboard >> Template >>Edit HTML;

Step 2. Check the "Expand widgets template" box;

Step 3. Search (CTRL + F) for this piece of code:


Step 4. Copy and paste the below code just before/above


Blogger Tricks


Note:
- change the 6 value from max-results=with the number of posts you want to be displayed.
- If you want the related posts to be displayed on homepage too, remove the code in violet.

Step 7. Save the Template


Hurry Previous Code Modified With Above Now its Tested by S2free Team Working 100% Fine.


Enjoy :)
Clean Add Related Posts Widget To Blogger With Thumbnails
Last Reviewed by S2Free Blog Team on June 10 2013
Rating: 4.5

LinkWithin Related Posts Widget With Thumbnail For Blogger

LinkWithin Related Posts Widget With Thumbnail For Blogger

related post


Displaying Related Post With Thumbnail will help you to increase traffic on your blog.If you want to add this type of widget to your blog above comment form then In this tutorial I will provide you easiest way by which you can add this widget to your blog.

To Add this widget to your blog follow below steps-


  • Go To LinkWithin
  • Now You will see form on right corner of the blog fill your information in it.
  • After filling Form Click On Get Widget Button.
  • Now It Will Redirect you to new page.
  • Click On Install Widget Link.
install widget

  • Now Select A Blog And Click On Add Widget Button
Add Widget
  • You Are Done Now Enjoy This Widget And Comment Below :D

Add Related Posts With Thumbnails In Metro UI Blogger Template

Add Related Posts With Thumbnails In Metro UI Blogger Template


Metro UI is an innovative Windows 8 Style Blogger Template. This theme has a lot of similarities with the Microsoft’s latest operating system Windows 8. This template is ideal for blogging niche like technology, multimedia, entertainment, magazine, and etc. Nonetheless, that’s not all because it is robust enough to be used on any kind of website. By default, this theme has a greenish color scheme. However, you can customize the theme as per the needs. It has some built-in extra-ordinary features like Numbered page navigation, Elegant Menu, 4 column footer, and much more.


Now We Are Telling You How To Add Related Posts With Thumbnails In Metro UI Blogger Template


Metro UI Blogger Template Show Related Post Under Each Post!

LinkWithin is a blog widget that appears under each post, linking to related stories from your blog archive.

Don't Let Your Past Stories Go to Waste!

We retrieve and index all stories from your blog archive, not just recent stories, making them accessible to new or casual readers of your blog who would not otherwise encounter them.

Increase Pageviews, Keep Readers Engaged

The widget links to stories that are relevant and interesting to readers of a particular post, keeping them engaged with your blog, and increasing your traffic.

Elegant, Unobtrusive Design

Our widget is minimally styled and blends in with your site design.

Free and Easy to Install

The widget is free and ad-free. It takes a minute to get the widget up and running on your blog, no signup required!

STEP TO ADD RELATED/YOU MIGHT LIKE ALSO
VISIT http://www.linkwithin.com

Enter your blogger Details :


You may change Platform for blogger, wordpress (Self-Hosted),Type pad & others
Click on Get Widget

Next Window
1. Click Install Widget to open Blogger in a new window, and follow the steps below in that window. Login to your Blogger account if necessary.

2. Select a blog if you have more than one, then click on Add Widget.


3. (Optional) For better performance, Drag and Drop the LinkWithin box under the "Blog Posts" box.


4. Click on Save.


And you're done! The widget should now appear on your blog.


Source VIA

_________________________________________________________________