How to Upload a Customized Header on Blogger Blog?
Those who are having blog in blogger, the free platform from Google, knows that the header option is not that flexible and you are not that independent to customize it and create a good header. So, what many people do to make it more attractive is upload a customized header image. This gives an extra appeal to the blog and your blogs becomes an exceptional one from other blog.To create such kind of header you must need to do two steps. One is to make one customized header and other is to upload it in the header. You can create the header many ways. But in my blog i have already instructed how to make one banner or header using MSpaint. You can check that post.
After creating the the header now you need to upload it in the header portion. To upload it in the header portion you can follow the below steps:
1. At first go to your blogger dashboard and then click on “Layout”.
2. Now you need to click on the “Edit” option of the header part. The image will be like below:

3. Now you need to upload the banner image from your computer that you have created. The screen will be like below:

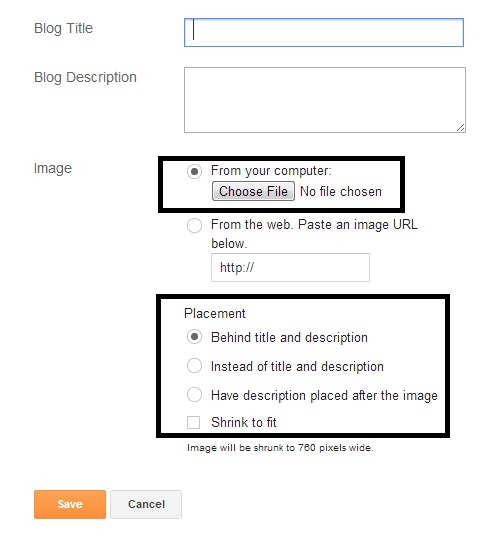
You can choose it according to your need and now you need to “save” the setting and you are done.
If you face any problem, you can ask me through comments.