Affichage des articles dont le libellé est Image. Afficher tous les articles
HP 4320t Mobile Thin Client - Microsoft Windows Embedded Standard 7 Image

HP 4320t Mobile Thin Client - Microsoft Windows Embedded Standard 7 Image

TITLE:
HP 4320t Mobile Thin Client - Microsoft Windows Embedded Standard 7
Image
VERSION:
6.1.7600.041 REV: A
DOWNLOAD (.exe)
DESCRIPTION:

This package contains the tools and image needed to restore or replace the
operating system image on supported thin client models that are running the
Microsoft Windows Embedded Standard 7 Operating System.

NOTE: The image contained in this package must be deployed on an HP 4320t
Mobile Thin Client with a minimum of a 1-GB flash memory card. This image also
requires that the Mobile Thin Client be configured with a minimum of 1 GB of
RAM.


PURPOSE:
Recommended
SoftPaq NUMBER:
sp50534
SUPERSEDES:
sp49624
EFFECTIVE DATE:
October 08, 2010
CATEGORY:
Operating System - Enhancements and QFEs
SSM SUPPORTED:
NO
PRODUCT TYPE(S):
Notebooks
HARDWARE PRODUCT MODEL(S):
HP 4320t Mobile Thin Client
OPERATING SYSTEM(S):
Windows Embedded Standard 7
LANGUAGE(S):
US English
ENHANCEMENTS:
This version of the image is based on Microsoft Windows Embedded Standard 7 and
contains the following features:

- Adobe Flash Player version 10.1.85.3, which is the latest Flash player version
- Citrix XenApp version 12.0.13.1
- HP Client Automation RALF version 7.9.35.1
- HP Device Manager Agent version 4.2.3660.9315, which is an updated uninstaller
- HP Info Center version 7.26.2010.923
- HP Monitor Support, which removed a duplicate "Files-Copy" directory from
Microsoft Windows Imaging (WIM) format
- HP Remote Graphics Software (RGS) version 5.4.1.0
- HP ThinState Capture version 6.0.0.33
- Microsoft .NET Framework 2.0, 3.0, and 3.5
- Microsoft Internet Explorer version 8.0.7600.16385
- Microsoft Remote Desktop Connection version 6.1.7600 (RDP 7.0 supported)
- Microsoft Windows Firewall
- Microsoft Windows Media Player version 12.0.7600.16385
- VMWare View Client version 4.0.1
PREREQUISITES:
Successful deployment and operation of the image requires a minimum of:

- 2 GB flash memory card
- 4 GB of RAM

HOW TO USE:
1. Download the file by clicking the "Download" or "Obtain Software" button and
saving the file to a folder on your hard drive (make a note of the folder where
the downloaded file is saved).

2. Double-click the downloaded file and follow the on-screen instructions.

This SoftPaq contains a utility that is designed to aid in the deployment of
this factory image. During the installation, you are prompted to choose one of
the following actions:

- Format a USB drive with the image and tools.
- Unpack the contents into a directory of your choice.

NOTE: To determine the version of your operating system, click the Start
button, which is located in the lower-left corner of the display screen, and
then select HP System Information. In the System Information panel that is
displayed, check the value beside the Image Version label.


Copyright (c) 2010 Hewlett-Packard Development Company, L.P.
HP SignagePlayer mp8000 Series Image (SoftPaq 1 of 2)

HP SignagePlayer mp8000 Series Image (SoftPaq 1 of 2)

TITLE: HP SignagePlayer mp8000 Series Image (SoftPaq 1 of 2)

VERSION: 1.0 Rev. A


DOWNLOAD(.exe)

DESCRIPTION:
This SoftPaq is 1 of 2 SoftPaqs that are required to restore the Microsoft
Windows Embedded Standard 2009 (WES2009) image on the HP SignagePlayer mp8000r
and mp8000s systems.

NOTE: This SoftPaq must be installed before installing the second required
SoftPaq, which is SP50933.


PURPOSE: Recommended
SOFTPAQ NUMBER: SP50511
SUPERSEDES: None
EFFECTIVE DATE: December 15, 2010
CATEGORY: Operating System - Enhancements and QFEs
SSM SUPPORTED: No

PRODUCT TYPE(S):
Desktops

HARDWARE PRODUCT MODEL(S):
HP SignagePlayer mp8000r: All Models
HP SignagePlayer mp8000s: All Models

SOFTWARE PRODUCT(S):
None

OPERATING SYSTEM(S):
Microsoft Windows Embedded Standard 2009

LANGUAGE(S):
US English

ENHANCEMENTS:
- Provides the initial release.

PREREQUISITES:
- This SoftPaq must be downloaded to a system that is running a Microsoft
Windows XP, Microsoft Windows Vista, or Microsoft Windows 7 Operating System.

- This SoftPaq (SP50511) must be installed before installing the second
required SoftPaq (SP50933).

- A 4-GB USB drive key must be used for a USB key image restore deployment.

INSTALLATION INSTRUCTIONS:
1. Download SP50511 by clicking the "Download" or "Obtain Software" button and
saving the file to a folder on your Microsoft Windows XP, Microsoft Windows
Vista, or Microsoft Windows 7 system. The SoftPaq must be installed on a system
running one of the listed operating systems. NOTE: The SoftPaqs are large and
may take as long as 30 minutes to install.

2. Double-click the downloaded file and follow the on-screen instructions.

3. Download the second required SoftPaq, which is SP50933, and follow the
instructions for that SoftPaq.


Copyright (c) 2010 Hewlett-Packard Development Company, L.P.

Convert Older, Newer And Home Blogger Text With An Image Or Stylish Text

Replace Older, Newer And Home Blogger Text With An Image Or Stylish Text 

Easy Customization of Older, Newer And Home Blogger Text With An Image
  Guys Make Your Blogger Stylish With This Text Replacement Widget. Newer Post, Home and Older Post are links that commonly appear on the bottom of the blogger posts. When a visitor click on one of these links, they will take him to the page with the list of your previous posts. The number of the posts on these pages will be the same as the number of the posts on your main page.

What We Will Do To Change Older, Newer And Home Blogger Text Into Cool Image

A. Change the text of Newer, Older, Home links
B. Place a picture beside them (a small icon, arrow, or whatever...)
C. Add an image instead of the links 

Use Following Steps To Change Your Boring Links Into Image 


1. Log in to your Blogger Dashboard, go to Template > Edit HTML


2. Click anywhere inside the code area and find - using CTRL + F keys - the following code:
 
expr:title='data:newerPageTitle'>
expr:title='data:olderPageTitle'>
expr:href='data:blog.homepageUrl'>


For change Older post

Replace  with below code
Previous Page

For change Newer post

Replace  with below code
Next Page


For Change Home Text

Replace  with below code
Home
Now after all change save your Template.

Now your blog is ready for new style now it will look like below imagehow to change older post and newer post or Home link with image in blogger


Before and After Change Text Link .(See Demo Image Below)      


Note-You also can Replace ,   ,
With your Text.
 You can try your favorite image for older post, newer post and for home Just use below code.
Your image URL replace with Your Favorite image URL Address. 
IF need any help to add this widget in  your blog feel free to comments us.

Change Boring Default Bullet Point Style In Blogger - Replace Bullet With Image

Replace Default Bullet List Point Into Image On Blogger

 
 How To Use Images For List Bullet Points On Your Blog

Today when I was thinking do to something awesome with Css then suddenly i saw bullets default blogger bullets are not looking so good so I decided to add images instead of bullets.

If you want to change blogger default bullets then find beautiful image but remember size of image should be very less or you need to add padding in Css code.

 How To Use Images For List Bullet Points On Your Blog

  • Go To Blogger Dashboad
  • Click On Template Tab.
  • Now Click on Customize button.
  • Now Select Advance Tab.
  • Now scroll down and you will see Add Css Option Click On It And Paste blow code There

 Watch Video Tutorial To Change Blogger Bullet List Point Style


.post ul li {
list-style-image:url('Bullets-Image-URL');
}

Replace Bullets-Image-URL With Your Bullets Image URL and save it.


Some Ready Made Bullets Code Just Paste below code in your blog Css

.post ul li {
list-style-image:url('https://blogger.googleusercontent.com/img/b/R29vZ2xl/AVvXsEhs4QWYjDWaOAE_7sNyLlxY8MU3R4U-RrCW1gDXySmkQRnw7hUmMKVBt-OCLPoznS2K8Rn66mtCCioZsR4COXNrgw5A2JLedme-BaBYpOn_M3MPTb2n6M9m3YNmCPSTUMU5IjXNWfrno-MO/s1600/11-dot-green.png');
}

.post ul li {
list-style-image:url('https://blogger.googleusercontent.com/img/b/R29vZ2xl/AVvXsEgcECoO5I0LyzLFKjzndOoB1stGQw890u-5WbRXNUnflaDSU-Kqp238Uo4KwIU4Siek6Pf6y_LjI0hSNKjCYY1qxceM2gljovVMH3NkNzjgybCF6l_MAgstULYKqnuD4S1c4oBPrpPIl0-h/s1600/bullet_page_white.png');
}


.post ul li {
list-style-image:url('https://blogger.googleusercontent.com/img/b/R29vZ2xl/AVvXsEikrL9leBIBVRn4F03Jemy3IvZfbF7CVzjTjE1bTGPdskNthBzhs0_YEzofWZmNqDi2tM7ErN9q5un0LozZUye4m427ZULchAAN_i71V_5e3-b7MIYArcPwOsS08MjXQ0mRF-timHLKcZYf/s1600/bullet_blue_arrow.png');
}

.post ul li {
list-style-image:url('https://blogger.googleusercontent.com/img/b/R29vZ2xl/AVvXsEiER0tW4Se3Rw7CbID0VyBILxSkykcA28PQvliKH3-B3hI0klUWP57jrpdM0vdlaH_OiIHv1XQyewD_Y-_e8B_yZslLTtFw9uP8hA0-2YW8b9cSz8mkwv9PbZw5ws6Ke7cEFh42WW2dkK6P/s1600/bullet_error.png');
}


.post ul li {
list-style-image:url('https://blogger.googleusercontent.com/img/b/R29vZ2xl/AVvXsEgERulSbgjYHLxhAdJDFkjq3_7CXyCFaA_0xhGZmE0YKF4SPXIg6P51TC95sbonEROTacQM3XrN_V0dhHrzzShFNSiITcnMfE1oz1wWStXgfuz_uj8oHie-5jq5Y_4OaebqWE9gYd2WdBUY/s1600/bullet_home.png');
}


.post ul li {
list-style-image:url('https://blogger.googleusercontent.com/img/b/R29vZ2xl/AVvXsEgVHbIua1aIjMOxtNIWUEaomPXmaDI-nFlQihmgeRzNbEEOqlNVONocqGlz53lS9XPu0cO8odrFiYee1ASzgdiz6kMDlwOpRFXVLnVU2-GJV7y8IKq4zh2jaDZ8NJmvDPiljIfGZ0uMyIOQ/s1600/bullet_tick.png');
}

.post ul li {
list-style-image:url('https://blogger.googleusercontent.com/img/b/R29vZ2xl/AVvXsEhTopJb8HvJPX3bFLb2feCI7WYfUBIoafQX51RJSmw3Zse0prahljy1HuOjlHdjUCv9jgYqPZ7FoLLxCVeSqsQc1Gm7iEsfswVg8LcFDqd15ETkOFGBlZlu_28G9lN4ojKqzEJTEmkxKRiC/s1600/chrome_icon.gif');
}


Comment And Share If You Like This Post Please!!!!

Add Recent Comments Widget For Blogger Sidebar With Image

How To Add Recent Comments Widget For Blogger Sidebar With Image

https://blogger.googleusercontent.com/img/b/R29vZ2xl/AVvXsEj5griLCmovxIssBPJIC7PGQsQ45ye4TlJ8aN2_nFvzwDaIGTOtE8PIXJWbdkgJxlucixKfr-r5Cq0GMHD2CSZWSuVzjtvBuvbSVEMZeYKOx4GyWe69Sxxm0ZFvuY0bRIcu0AdCdoFBcjg/s1600/Recent+Comments+with+Avatar.png

Recent Comments Widget with Avatar for Blogger/Blogspot

 Recent Comments widget with Avatar for Blogger Blogs. Recently Blogger updated the Comments API for   In this widget we can show the Avatar of Commenter using the updated the Comments API. as you seen my Recent Comments Widget, this is looks exactly same to my Recent Comments Widget.
In this Widget i included the Comment Excerpts and Avatar Image. you can choose default Anonymous Avatar Image also.

Take A look :- 


 How To Install The Recent Comments Widget with Avatar For Blogger

Step 1. Go to your Blogger Dashboard >> Layout >> Add a Gadget


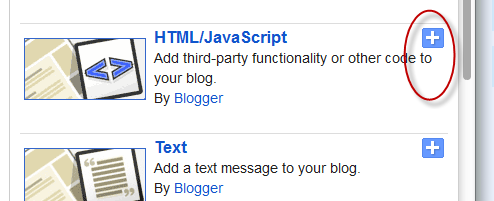
Step 2. From the pop-up window, scroll down and choose the HTML/JavaScript option:


  Step 3. Now copy and paste the below code in the HTML/JavaScript box:


Step 4. Replace your-blog-name with your blog url.

Step 5. Click Save and you're done.


Hope you'll enjoy it!

USB Image Tool - Free Open Source by alexpage

Download Free USB Image Tool 


 Free Open Source by alexpage

Overview
USB Image Tool can create images of USB flash drives and MP3 players, that are mounted as USB drives. It allows you switch between images with different music styles on your MP3 Player or to make an exact backup image of your USB Stick.
Features
  • create image files of USB flash drives
  • restore images of USB flash drives
  • compressed image file format
  • show USB device information
  • manage favorite USB images
  • command line utility
Screenshots

 USB Image Tool showing a SanDisk USB flash drive and a Card Reader


USB Image Tool showing the favorite images tab


Supported devices

USB Image Tool works with any device, that implements the USB Mass Storage protocol. This includes flash drives, card readers and a lot of other devices, like digicams, cell phones and mobile music players.
USB Image Tool supports the globull secure mobile work environment.

Direct Download Link


The previous version can still be downloaded.
 

Add Simple Image Gallery To Blogger

How To Add Simple Image Gallery To Blogger 


Lot of Blogs are using image gallery to show there user image on post easily because it is not possible to add image slider every where in blog.Image gallery are easy to use and fast loading so it don't effect blog post that's why we consider image gallery a best way to show off image to users.This image gallery is made by dynamicdrive.I just converted this widget to blog by which we can easily use this widget.I hosted all codes externally by which you don't need to copy and paste lot of codes.

Add Simple Image Gallery To Blogger

  • Go To Blogger Dashboard
  • Click On Layout Tab
  • Now Add Gadget>>HTML/Javascript
  • Paste Below Code In It


You can also add this slider in between post you just need to paste  above code.

 Customization


Replace Your Image Link Here with Image URL which you want to add to this widget.

To Add Description to your image Replace YOUR IMAGE DESCRIPTION HERE with your words.

To adjust widget width and height replace 400, 265 ( 400 is for width and 265 is for height )

If you want to turn of auto play of images then simply change true to false

To change the time interval between next and previous slide then edit 2500

How To Optimize Image For Better SEO

 How To Optimize Image For Better SEO 


Do you know that image on your blog can drive lot of traffic to your blog but for this we need to optamise image for better Seo.In this post I will try to give you several easy way by which you can increase chances of your blog image to show in search results.

Giving Alt Text To Image


Search Engine spider can't recognition what's going on in picture,If your picture is not having Alt Text then Search Engine Spider will ignore that image and it will cause harm to blog SEO.Alt Text is the text that the search engine uses to understand images.

alt="Baby Crying" />

In above text box red color green color text is known as alt text here you can insert any text according to your image.Blogger and WordPress both are providing a tool by which we can add alt text to our blog image easily.

How To Give Alt Text To Blogger Image
If you are blogger user then follow below step to give alt text to your blog images-
  • After Uploading Image to Blogger,Just click on image and you will see several option to optamize image.
  • Just Click On Properties Link.
click here
  • After Clicking On It A Pop-out will appear in which you will find way to add image Title And Alt Text Just fill it according to your image and click on ok button.

write anything
How To Give Alt Text To WordPress Images

If you are WordPress user then follow below steps to add Alt Text to your blog images.


  • While Uploading Image to to your blog you will find several option to optamise your image just remember to fill Alt Text And Image Title.

File Name Of Image Should Be Proper


Before Uploading Image to your website check that file name of image should explain image.For example if your image is having picture of Talking tom then the file name should be Talking Tom.If you are adding proper file name to your image then there will me more chances of your blog image to show up on search engines results.

title of guest posting

Optimize Image With Tools


There are several tools on web which help to optimize your image for better seo,this tools are just decreasing file size of your image by which your image can load fast.If you want to Optimize you image with this type of tools then follow below steps-

  • Go To Image Optimizer
  • Now Upload Your Image which you want to optimize for better seo.
  • You can also change output format of image.
  • Finally click on Optimize button and result will appear in front of you.
After following above steps you will see change in traffic of your blog.For More SEO Tips and Tricks Just Subscribe Our Blog.